Tuesday 19 June 2012

What A Jubilant Month!!!

Phew! We've had a busy couple of months. Let us bring you up to speed on why our little blog has been lacking in posts!

First there were the fairs, of which we did two. The first was for loyal crafters organised by the fabulous Ann at Save the Children. This was our pretty stand with my beloved Singer sewing table at the front:


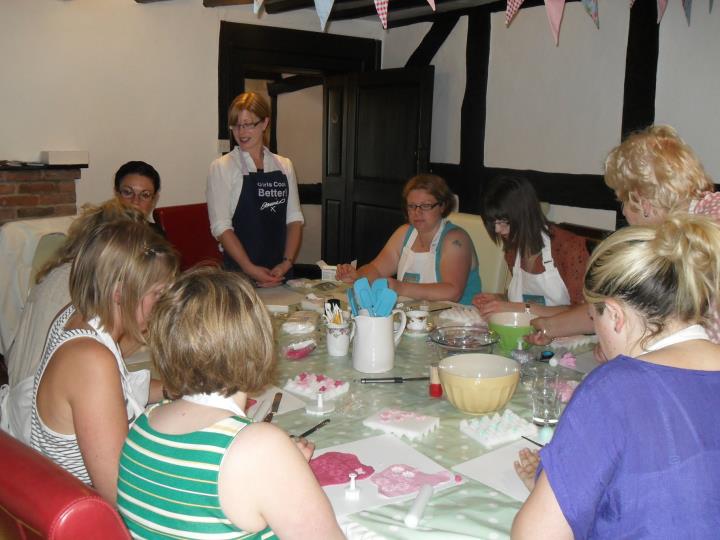
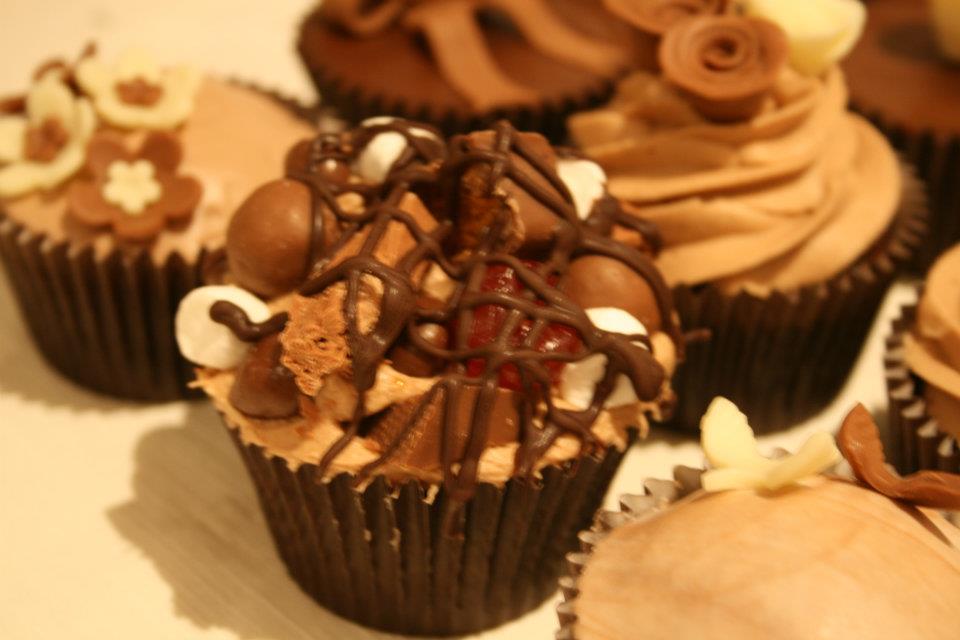
Then there was of course the Jubilee! We had a rather fabulous and fun cupcake class to kick it off with a celebratory spread of tea, fizz and sandwiches. Our ladies produced some very fabulous looking cupcakes that night- despite the fact the drinks were flowing!


We also had a stand at the Clements Street Vintage Fair which was organised by Helen at the Grand Union. The British weather just about held up, and as you can see, I had some helpers so was able to indulge in a little of the 'atmosphere'! 


Over the last few months we have also had a few little bits of press coverage. It all started with the observer and this not so flattering image, but we also had a little mention in the June edition of Warwickshire Life magazine too!


And finally there was a lovely blog written about our Mediterranean bread baking workshop earlier this month and our star tutor 'The Revel Baker'. You can see what the lovely Lula made of our class here 

So what's next for us? Well we have some hen parties going on at the moment and we just lurve a good wedding celebration - they are always such a giggle!


Next, we really must get a wriggle on and plan our autumn and winter event calendar. I know, we've not had a proper summer yet and would you believe we're planning crimbo workshops already! It feels wrong to us too.

It's a mad world, but we are really enjoying the ride. Thanks to all our lovely clients who have supported us over a busy couple of months, and of course, to friends of Revival who have turned out even in the rain to help man our event stands! We love you all! xxx
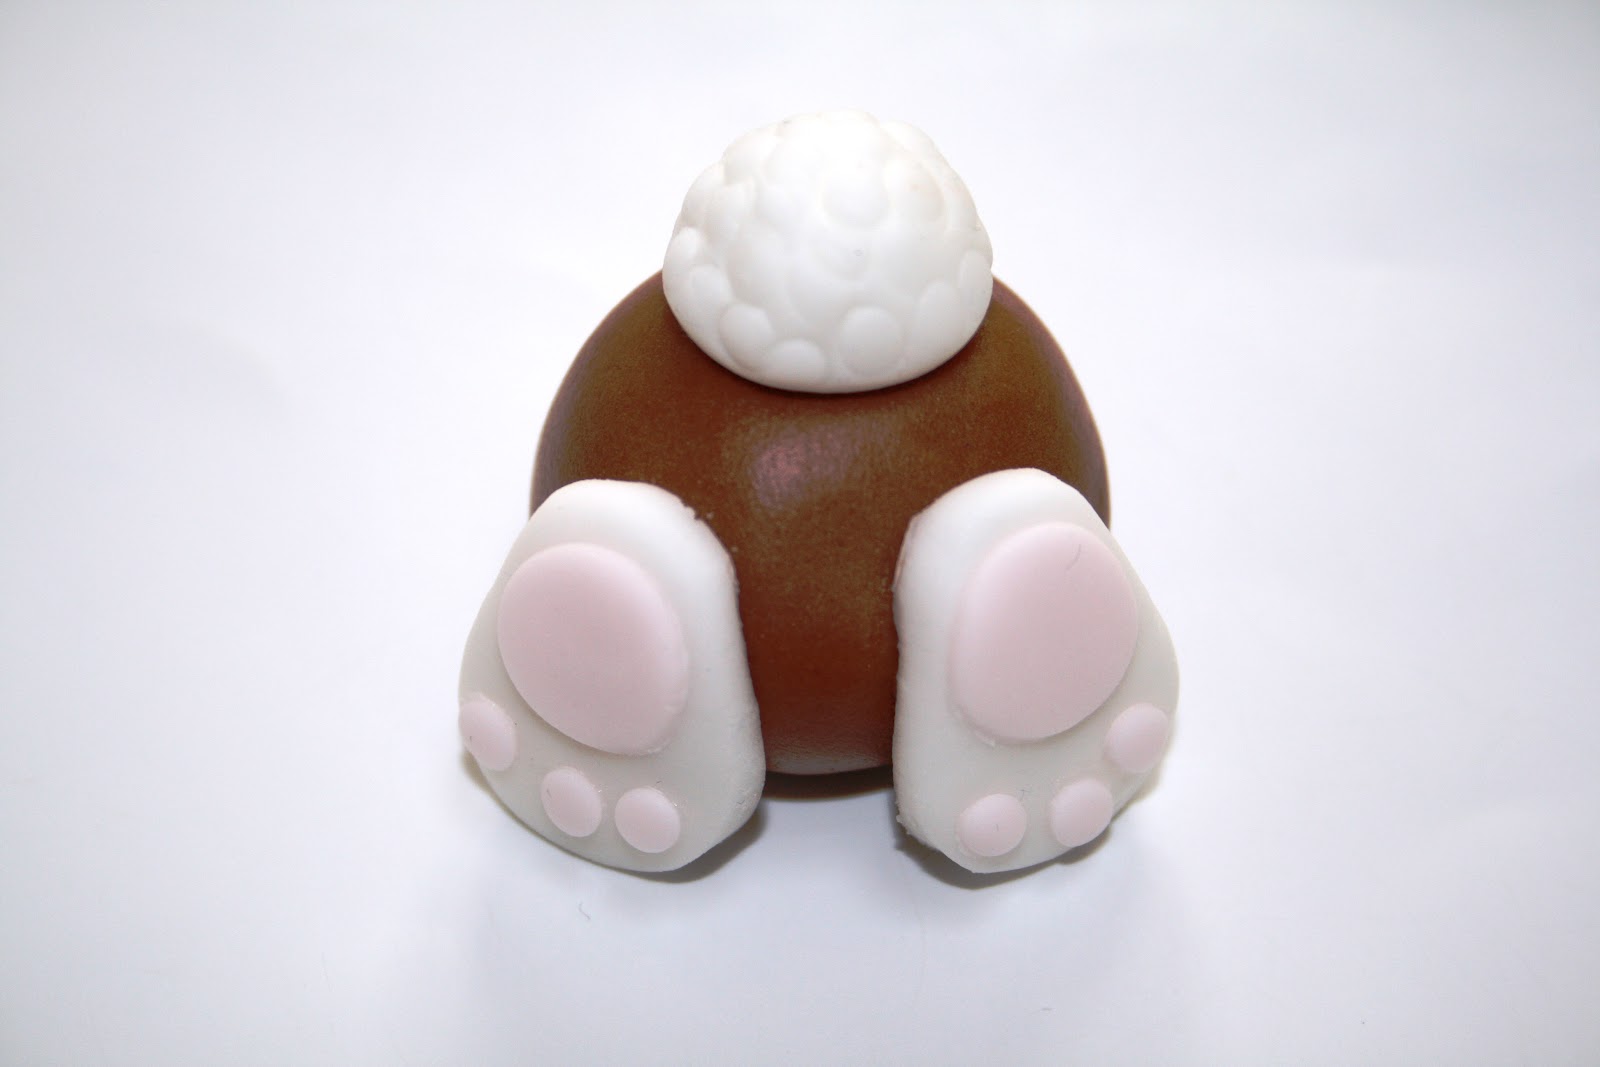
Sunday 15 April 2012

A party to remember

You may already know that we can offer any of our creative workshops as a party package just for you and your friends, but did you know that we can add an afternoon tea party or evening of cocktails and burlesque too? This way, you can extend the fun right through the day and into the night too if you wish!

How do you fancy fascinator or jewellery making, combined with cocktails and a burlesque dance routine for a party with real attitude? Just one of our fabulous packages that we can arrange at a venue near you.

The party of the moment though, and by far our most popular package, is our "It's all about the vintage!"

Create vintage inspired cupcakes with little bows, buttons, roses and pearls in our creative workshop. Then follow it with a stylish afternoon tea party from a bygone era! Et voilĂ !


We can provide an array of vintage linens and china (including our very own mis-matched china cake stands), genuine costumes and props from 1910 to the 1940's, and of course, lots of yummy deliciousness to stuff yourself silly on!

Whatever combination you choose, our bespoke service means that you can tailor a special day to the birthday girl or hen.

Plus all party bookings of 10 or more also include a free bottle of fizz!

Love RevivalSteph
x

Thursday 5 April 2012

Easter Making Fun!

We love this time of year! There is so much promise that a fabulous summer is just around the corner. But, with the weather taking a turn for the worse just in time for the holidays, we thought you may be in need of a little creative inspiration. 


Here is our pick of mini makes and bakes for you and the kids this Easter:


Sew! 


If you have little ones old enough for a bit of hand sewing, why not make these cute felt bunnies?

Felt Bunny Cosy

See Emma Castle's Felt Easter Bunny Egg Cosy Tutorial  on another lovely blog by the talented Annie The Felt Fairy. You'll find a downloadable template and easy step by step instructions.


Knit! 


We just can't get enough of egg cosies this Easter and this seriously cute knitted bunny cosy is such a winner!

knitted egg cosy

You can download an easy knitting pattern from Natural Suburbia and whilst visiting their site, check out the great seasonal recipes too! 

Craft! 


This is an oldie, but aren't they the best!


You all know the score by now, take some eggs, stick a pin in them, blow out their insides and paint (we found acyclic paints work best, followed by a clear varnish).


This lovely project was made by a very dear friend and her creative lovelies, Niki and Corrie. Proves there is no age limit on this one! Take inspiration from these crafty ladies and string your painted eggs with pretty ribbon from budding spring twigs. Stand in a jam jar for that perfect vintage look. Doesn't it just make the most beautiful window display?


Bake! 


Ok, so it has to be chocolatey at this time of year, but we wanted to escape the ordinary shredded wheat nests for the kids and simnel cake for the adults. Well, of course it had to be cupcakes! 

Death by Chocolate Cupcakes

We will most certainly be following this recipe for Death by Chocolate Cupcakes this weekend using all our favourite chocs! The kids will love the decorating bit too! 


If you're making for chocolate-loving adults, perhaps add a little splash of your favourite alcoholic tipple into the frosting too! (Come on! We all know that calories don't count at this time of year right?!) 


Finally, we couldn't go without telling you about these little baking beauties...

Mini Eggs Cookie Mix Jar

These cookie mixes by Bakedbyme are a great cupboard saviour for rainy school holidays and would make a fab alternative gift for the Sunday lunch cook too! ...hint hint! 


Put the kettle on, snuggle up warm and make something gorgeous this Easter! 


Have a happy Easter! 


With love, RevivalSteph 

Sunday 1 April 2012

Sew wonderful Sundays!

This Sunday, despite the return of the sunshine, I am really missing some dedicated time just to sit and sew! 

Our first course of three 'learn to sew' workshops came to an end last weekend. We had an all-girl ensemble for all three workshops, so there was much more natter than sewing at times, but it was a lovely affair! 

We started with the basics of getting to know a sewing machine. We learnt what happens if your bobbin tension is too tight, and what happens if your bobbin runs out of thread too, with more than one lady being fooled into thinking their lovely straight lines were anything but one-sided!

We had planned to keep it simple with an envelop cushion, joined at the back with a few hand sewn snap fasteners. Our ladies had other ambitions! They all decided to tackle the dreaded machine button hole instead! It may have been brave but the results were superb! This group was certainly up for being challenged! 


Week 2 was the basics of dressmaking, sewing mini pinafore dresses or dungarees for little ones.


It was a lot to cover in just three hours but the ladies did so well with our second challenge. 


They even managed to sew the last hem at home themselves, rather than carry their projects over to week 3! 


We sent out bespoke, made-to-measure patterns in the post following the workshop, and we can't wait to see more little clothes being made at home in the future with lots of love and pride! Send us your pictures please ladies! 

We finished the course last Sunday with a slower paced workshop designed to take stock of all the skills that had been taught so far, and of course, a few new tricks too! We looked at how to make your wardrobe work for you and tackled: bleach spills to a dress, jeans which were a bit long in the leg, a skirt that was too big on the waist and even a onesie which was too big in the body! The results were a marvel to see. 

So this week we're saying "thank you", to our fabulous sewing ladies and for wonderful Sunday afternoons. 

We'll be running the next course of 3 workshops again in October. If you can't wait until then, why not sign up to bunting sewing in May - perfect timing for your Jubilee party and a great workshop for a beginner! Or, if like our ladies you are also up for a challenge, we are getting ready to run a dressmaking course which will show you how to make a lovely vintage-style dress for yourself in July. Contact us for details

Go on, get your sewing groove on this spring! 


Happy crafting! 


Love RevivalSteph 

Friday 23 March 2012

Spring is sprung!

This week’s blog post has been written by one of our tutors, Becky. (We featured her work a few weeks ago here).

Becky will be hosting our sell-out 'springtime cupcakes' workshop next Friday in Warwick. She will show workshop attendees how to create these little beauties! Aren't they just fabulous?!


Places on this workshop sold out fast, but just in case you missed out, we thought we would bring you a special preview and show you how to make the very cute rabbit bottom cupcake at home. (It also happens to be our favourite one!)


To make Becky's rabbit bottom cupcake, you will need:


·         Non stick mat
·         Non stick rolling pin
·         Edible glue
·         Clean paint brush
·         Pink/white/brown sugarpaste (or colours of your choice)
·         A circular cutter, or use small writing nozzles for cutting smaller circles

Step 1: 
Form two balls of white sugarpaste and flatten to make two feet shape approximately 1.5cm in length


Step 2:  
Roll out pink sugarpaste and cut 2 larger circles and 3 smaller circles for the paws. Stick on using edible glue. 


Set aside to dry.

Step 3:  
Form a small ball of white sugarpaste for the rabbit’s tail. Use the end of the writing nozzle to make circle indents to create the “fluffy” look. 


Set aside to dry

Step 4:  
Form a ball of brown sugarpaste about the size of a walnut and flatten the bottom on your mat.


Step 5:
Glue the feet and the tail onto the brown body. 


Step 6:
Pop your finished rabbit’s bottom onto your cupcake and decorate with flowers to make it pretty!


Hey presto! A very fetching rabbit cupcake! Perfect for making with the kids in the Easter holidays.


Did you know? Cupcake decorating equipment can be purchased from our website directly in the form of one of our fabulous DIY cupcake kits, or if you need something specific, we recommend checking out local business Kenilworth Baking Supplies

Happy creating! J

Friday 9 March 2012

Make it yourself… cushions!

Last week was the first sewing workshop in our Sew Sundays programme. Everyone got to grips with their machine, our 2 new Janome boys were taken for their first spin and we even conquered buttonholes! In fact, you simply wouldn't believe how professional all the cushions looked! Now, we wouldn't normally give away our workshop secrets, but as it is Mother's day soon, we thought these cushions would be the perfect handmade present for mummies everywhere! Here's how to... 

You will need:  
A cushion pad, some fabric, matching cotton, pins, scissors, tape measure, pen or dressmakers chalk and 3 buttons. We used a super cute Cath Kidston dog print fabric for the front and a candy red stripe for the reverse.


Step 1
Measure the cushion pad- we used 18 inch pads (46cm square). Draw out a square on your fabric using dressmakers chalk or a pen, which is 5cm greater all the way around than the cushion pad  (51cm x 51cm in our case). Cut this out. This will become the front of our cushion.

Step 2:
The back of our cushion is made from two separate pieces. They should both measure the same vertically as the front piece (51cm) but the width should be half this (25.5cm) plus 9 extra centimetres. In our case each back piece totalled 34.5cm across and 51cm down. Cut these out.


Step 3:
Put the front piece to one side. On each back piece fold in 1.5cm along the longer, vertical edge and iron this down. Now fold in another 4cm and iron down again. Stitch down along the inner vertical edge of the fold using a standard running stitch on your machine.


Step 4:
Now for the buttonholes! Arrange the buttons on one of the back pieces along the fold. We used three big buttons. Mark their positions lightly with a dot at the top and bottom of each button. 


According to your machine’s instructions for making buttonholes, work the holes between the dots you have marked (extending the buttonhole slightly beyond each). Now cut the centre out of your stitched buttonhole using some sharp scissors and iron it down again. 


Lay the back piece of fabric with the newly made holes to the right, over the top of the other back piece with the folds also to the right. Mark a dot through the centre of each hole onto the piece below. This is where you will stitch on your buttons. For now pin it together with the piece with the holes overlapped on the top.


Step 5:
To sew up our cushion, retrieve your front piece and lay it on the table with the right side facing up. Place the fastened back pieces over the top with the right side facing down i.e. the two right sides are facing each other. Pin all the way around and trim any mismatched edges. Machine 1.5cm from the edge all the way around.


Step 6:


Turn your cushion cover out


Sew on the buttons and insert your cushion pad! 


VoilĂ ! The perfect handmade present for Mother's Day!


Why not check out our upcoming sewing classes and take your skills to the next level! 

Happy creating folks! 

Friday 2 March 2012

Meet the tutor!

We thought it was about time that we brought you a peek behind the scenes into our very special Revival tutors.

Introducing …. Becky! Becky is one of two cake tutors that teach for RC. She runs Baked By Becky and her specialist area is cupcakes.


We thought we’d drag her away from her baking for a cuppa and a few personal questions! 

RC: So Becky, why baking?

B: I have always enjoyed baking and have several great memories of baking days with my Mum where we would make all kinds of biscuits, cakes and tray-bakes. Having given up work 2 years ago after having my second child, I caught the baking bug again and proceeded to bake cupcakes for various friends, family and my husband to take into work for his colleagues. 

RC: When did you set up Baked By Becky?

B: Nearly a year ago after baking cupcakes for my daughter’s Christening, Baked By Becky was born! I started off with the odd order and before I knew it the business had gone from strength to strength. 

RC: What’s your best seller?

B: For pure indulgence the Rocky Road is a chocoholic’s dream but the most popular flavour by far is the simple but gorgeous vanilla cupcake.


RC: What’s your most novel request?

B: I am known mostly for my novelty decorations and for tailoring each cupcake to the recipient. These ones I made for a hen-do, the bride-to-be was marrying a farmer!


RC: What do you love most about running Baked By Becky?

B: Whatever the order, the thing that spurs me on is seeing the look on someone’s face when they receive their box of cupcakes, each one made from scratch, by hand, especially for them!

You can contact Becky and order some of her favourite rocky road cupcakes or join her to learn how to create Spring Cupcakes on March 30 in Warwick or Vintage Cupcakes on April 21 in Stratford.

Yummy! 

Friday 10 February 2012

Meet our new additions!

As this is a (relatively) New Year and new start for many of us, we were thinking that some of you might like to give sewing a try for the very first time? However, we understand that you may just want to see if you like it before committing a whole New Year’s resolution to learning to sew or buying your first machine!

We know that for some of you it's quite different, and you have owned sewing machines (either because you have been given them by family or because you purchased them yourself with great intentions some time ago) which are now gathering dust in the loft or cupboard under the stairs.

With this in mind, we have constructed 3 perfect sewing workshops whichever category you fall into. Each week will gradually increase in difficulty, but we'll start by helping you to build a friendship with your machine. 
(No, we haven't gone mad! Honestly, sewing machines have individual personalities!) These are the workshops: 
  • Sunday 4 MarchSew a simple cushion
  • Sunday 11 March - Sew kids clothing : mini-dungarees and pinafore dresses
  • Sunday 25 MarchSew alterations : zips, nipped waists and tricks for regenerating your wardrobe
So, without further delay, let us introduce our new co-workers for all of you who are new to sewing…


We have hand-picked these beauties as the perfect machines for beginners. They have no whizzy gadgets and definitely no digital display settings, just easy-peasy sewing! And, to make you feel even more positive towards them, we are even going to name them and suggestions are welcome! 


You're not seeing double- we do have two! They are available for reservations now (dinner dates optional!) Simply let us know that you would like to borrow one of our lovely chaps in the ‘additional information’ box when you pay for your class online. We’re sorry but reservation requests will be handled on a first-come-first-served basis!

Go on! Book one out for a spin today! 

See you at a workshop soon x


Fancy snipping a bit off the price of one of our sewing workshops?


Simply sign up to follow our blog and add a comment to this post with your name suggestions for our boys. Don't forget to include your email address! 
We will then drop you an email with a special discount code for 10% off one of the sewing workshops!

Thursday 26 January 2012

Welcome to 2012!

It's 2012! Can you believe it? Happy New Year to you all! 


We've decided to launch the New Year with a shiny new blog! Do you like it? We are very excited about it!  

This blog is our New Year's resolution and our way of giving something back to you lovely creative people! So here goes with this year's promises…

  • Every week we promise:

·     To bring you the latest news from HQ. This might be some juicy behind the scenes gossip about us, our tutors or maybe a little teaser for something we are working on!

  • Once a month we promise:

·      To let our hair down with a little make or bake fun for you to try at home, with top tips and lots of creative inspiration!

  • Every now and again we promise:

·        To offer you something tempting!  Because who doesn't love a special deal or competition? 


So, if you have decided to make your 2012 resolution a creative one, then follow our little blog and together with your comments and ideas too, let us help each other to make 2012 the craftiest year yet! 


Let's get cracking! x